Wednesday, September 28, 2011
Tutorial
I just created my first 3Ds Max tutorial!
I focused on the basics and then moved onto talking about the biped-- the biped is a lot of fun! I can't wait to work with it more.
Unfortunately though, making this tutorial was a pain. I had to do it over 6 times because the screen capture software I downloaded was acting up... that and I kept forgetting my script and ques...
I'm currently uploading the video tutorial to youtube, then I'll post it here!
Monday, September 26, 2011
Biped
Over the weekend Nick helped me understand more about 3Ds Max.
As I mentioned earlier, as an animator for the DND he uses Max daily!
He showed me how to use the biped, a feature he often works with.
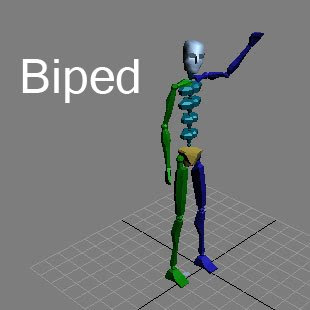
The biped is a human skeleton that you can rig a humanoid model to and animate. It makes the rigging process easier as you don't have my make your own skeleton and worry about making sure it moves properly- its already created to do so!
I especially like the biped because this feature does not exist in Autodesk Maya (as far as I know). It make things simple!
Either for my first tutorial or my second, I will work with the biped and show many of the neat things it can do!
Thursday, September 22, 2011
Playing Around
So today I began to really play around with 3D Studio Max.
Having been trained in Maya I was a little confused with the controls and layout for this software, so I sought out a beginner's tutorial for Max.
I found a 4 part tutorial by Aaraon F. Ross, under the youtube alias of DigitalArtsGuild. I found the tutorial very helpful. It was fairly slow paced and it talked about the most basic of basic controls, which wasn't really necessary for me, but it was appreciated none the less.
Find the DigitalArtsGuild tutorial HERE
Part 1/4 went over the interface, object creation and the transform tools.
Part 2/4 focused on viewport navigation and hotkeys.
Part 3/4 discussed display options, viewport configuration and object properties.
Lastly part 4/4 explained the snap to grid option, modifiers and the free form deformer tool.
In part 4/4 while going over the free form deformer tool, the tutor showed how to use the tool by creating a very basic icecream cone. I decided to follow along and make my own icecream cone, too!
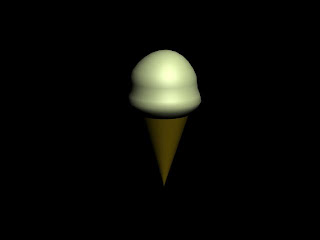
Doesn't it look... delicious...?
With the basic understand of how to use/navigate 3Ds Max I am going to start watching more advanced tutorials.
I would like to have a better idea how to model so I can create my own model for the first tutorial, a week from now.
I think I will focus on animation for my second tutorial... or maybe I'll switch it up?
We'll see!
Friday, September 16, 2011
The Adventure Begins!
So my adventure into the class; 3D Exploration Software, begins!
The purpose of this class is to try out different 3D programs so my classmates and I graduate as well rounded, well educated, hard little workers!
We are to chose 3 different 3D programs to play around with. I decided to try out the following:
1. Autodesk 3ds Max
2. Messiah
3. Zbrush
I am very excited to try each of these 3D programs and test out what each of them has to offer.
As we speak I am installing a student edition of 3ds Max, which I will be working with for the next month. During this month I will be creating two video tutorials showcasing my learning.
My boyfriend, and fellow NSCC alumni, Nick Macdonald is an intern at the DND. As part of his job, he works closely with 3ds Max and often tells me of its advantages over Autodesk Maya, the 3D program I am most familiar with.
I look forward to the learning I have ahead and hope everything goes fairly smoothly!
Subscribe to:
Posts (Atom)